Using address sanitizer (ASan) to debug C/C++ memory issues in Android applications

At NRB Tech, we sometimes use C or C++ libraries across multiple platforms, i.e. in the firmware, apps, and even on the server. This code sharing enables a solid foundation to be built which is well unit tested and works the same everywhere. It is very useful for data processing – encoding and decoding binary data formats for data transmission over Bluetooth, and cryptography – encrypting and decrypting data transmitted between devices.

However, this approach can cause issues. C is notorious for its unsafe memory management, which allows great flexibility, but can lead to memory corruption, data loss, data leakage, and crashes. Using best practices and unit testing code can mitigate some risk, but bugs can still occur, and debugging these issues can be tricky.

When developing for Android, Google have a number of tools available to help debug memory issues in NDK (Native Development Kit) C/C++ code. The approach recommended by Google is to use ASan, however the ASan documentation is currently (March ‘22, Android Studio 2021.1.1, Gradle 7, APIs 27+) missing crucial information to enable developers to debug these issues. In this article, we will provide a step-by-step guide to debug a memory issue. We have also create a working example project on GitHub.

From a stock Android project with CMake:

  1. To start your App with the address sanitizer library, your App needs to be run with a wrapper script. This is a script that is run on your test device and starts the application, modifying the environment variables and/or command arguments. As such, this script needs to be copied into your App at build time. Additionally, we need to copy the ASan libraries out of the NDK and into our project so they are copied into your App when building. Both of these steps need to be done for 4 CPU architectures, so can be laborious. Instead of doing this by hand, we can use a script to set this up. Run this from the root of your project, modifying the NDK version if required.

    #!/bin/bash
    
    cd "$(dirname "$0")"
    
    # This script sets up the required directories in app/src/sanitize. It can be run again if you change the ndk version.
    
    ndkversion="24.0.8215888"
    
    # store wrap.sh to variable
    read -r -d '' script <<'EOT'
    #!/system/bin/sh
    HERE=$(cd "$(dirname "$0")" && pwd)
    
    cmd=$1
    shift
    
    export ASAN_OPTIONS=log_to_syslog=false,allow_user_segv_handler=1
    ASAN_LIB=$(ls "$HERE"/libclang_rt.asan-*-android.so)
    if [ -f "$HERE/libc++_shared.so" ]; then
      # Workaround for https://github.com/android-ndk/ndk/issues/988.
      export LD_PRELOAD="$ASAN_LIB $HERE/libc++_shared.so"
    else
      export LD_PRELOAD="$ASAN_LIB"
    fi
    
    os_version=$(getprop ro.build.version.sdk)
    
    if [ "$os_version" -eq "27" ]; then
    cmd="$cmd -Xrunjdwp:transport=dt_android_adb,suspend=n,server=y -Xcompiler-option --debuggable $@"
    elif [ "$os_version" -eq "28" ]; then
    cmd="$cmd -XjdwpProvider:adbconnection -XjdwpOptions:suspend=n,server=y -Xcompiler-option --debuggable $@"
    else
    cmd="$cmd -XjdwpProvider:adbconnection -XjdwpOptions:suspend=n,server=y $@"
    fi
    
    exec $cmd
    
    EOT
    
    # loop through all architectures and write/copy the required files
    archs=( "arm64-v8a" "armeabi-v7a" "x86" "x86_64" )
    asanarchs=( "aarch64" "arm" "i686" "x86_64" )
    
    for i in "${!archs[@]}"; do
      mkdir -p app/src/sanitize/{jniLibs,resources/lib}/${archs[$i]}
      cp $ANDROID_HOME/ndk/$ndkversion/toolchains/llvm/prebuilt/*/lib64/clang/*/lib/linux/libclang_rt.asan-${asanarchs[$i]}-android.so app/src/sanitize/jniLibs/${archs[$i]}/
      echo "$script" > app/src/sanitize/resources/lib/${archs[$i]}/wrap.sh
    done
  2. In your CMakeLists.txt, add the following (replacing ${TARGET} as required with the name of your target):
    if(SANITIZE)
         target_compile_options(${TARGET} PUBLIC -fsanitize=address -fno-omit-frame-pointer)
         set_target_properties(${TARGET} PROPERTIES LINK_FLAGS -fsanitize=address)
     endif()
  3. In your app's build.gradle, to your android.buildTypes closure, add:
    sanitize {
        initWith debug
        externalNativeBuild {
            cmake {
                arguments "-DANDROID_STL=c++_shared", "-DSANITIZE=TRUE"
            }
        }
    }
  4. Sync Gradle and switch your active variant to "sanitize" in the "Build Variants" tab (bottom left)
  5. Debug your App and reproduce the issue. You should see output from address sanitizer (filter by "wrap.sh"). In the stack traces you will see lines like:

    #1 0x5e2cdaf76c  (/data/app/~~lTqqcXu2okmchd_nMeTm7w==/io.nrbtech.asanexample-spc73OiysYUjJ2984-N4kw==/lib/arm64/libasanexample.so+0x76c)

    Where libasanexample.so is the name of the compiled C library and 0x76c represents the offset into the library the stack trace is pointing to.

  6. We need to convert that address offset to a file and line number to understand where the problem occurred. The following script uses llvm-symbolizer in the NDK to do this.

    #!/bin/bash
    
    ndkversion="24.0.8215888"
    libname="asanexample" # change to your library name
    
    # default arch
    arch="arm64-v8a"
    
    POSITIONAL_ARGS=()
    
    if [ $# -eq 0 ]; then
       echo "Pass an address as the last argument, use -a to provide architecture"
       exit 0
    fi
    
    while [[ $# -gt 0 ]]; do
     case $1 in
       -a|--arch)
         arch="$2"
         shift # past argument
         shift # past value
         ;;
       -*|--*)
         echo "Unknown option $1"
         exit 1
         ;;
       *)
         POSITIONAL_ARGS+=("$1") # save positional arg
         shift # past argument
         ;;
     esac
    done
    
    if [ ${#POSITIONAL_ARGS[@]} -eq 0 ]; then
       echo "Pass an address as the last argument"
       exit 1
    fi
    
    cd "$(dirname "$0")"
    
    $ANDROID_HOME/ndk/$ndkversion/toolchains/llvm/prebuilt/*/bin/llvm-symbolizer --obj=app/build/intermediates/cmake/sanitize/obj/$arch/lib$libname.so ${POSITIONAL_ARGS[0]}

    Copy this to the root of your project and modify for your C library name and NDK version. You can then run this script like so:

    % ./symbolizer -a arm64-v8a 0x76c
    Java_io_nrbtech_asanexample_Test_test
    /Users/nick/Documents/Repos/ASanExample/app/src/main/cpp/test.c:7:5

    The output contains the path to the line of code pointed to by the stack trace, enabling you to find where the issue occurred and figure out the problem. In this case, it points to a line where we free'd a pointer twice.

  7. ASan can slow down your App, so be sure to switch back to the debug variant when you have resolved your issue.

Good luck resolving your own memory problems in Android Apps! If you need further help, feel free to reach out to NRB Tech!

Nicktutorial, Android, cmake, C, ASanComment
Using nRF Connect SDK with CLion

Previously we established how it is possible to use Nordic's nRF5 SDK with CMake and CLion. In April 2020 Nordic released version 1.0.0 of nRF Connect SDK, the new platform for Nordic products moving forward. This SDK is based on the Zephyr RTOS. Zephyr uses CMake as its build system, making it is much easier to use in CLion than the nRF5 SDK. However, there is some setup that we need to do.

Prerequisites

The nRF Connect SDK supports nRF52 series SOCs in addition to the newer nRF53 and nRF91 SOCs. All development kits and Thingy boards are supported. The nRF Connect SDK can be used on Windows, macOS and Linux.

Setting up the toolchain and SDK

The best way to set up the SDK and toolchain on Windows and macOS is using the nRF Connect Toolchain Manager. This is the simplest way to get set up, and it also ensures that all toolchain dependencies are in one place and at the right versions for that SDK version.

Manual setup instructions are available too, which can be used for setup on Linux.

Throughout this tutorial, when paths to the SDK are needed, we will use <ncsroot> as a placeholder. If using the Toolchain Manager with version 1.4.2, on Windows this would be C:\Users\<user>\ncs\v1.4.2, on macOS this would be /opt/nordic/ncs/v1.4.2.

Creating a custom project to use in CLion

  1. Find a relevant sample from the SDK in the <ncsroot>/nrf/samples directory. Copy this to a convenient location on your system. Rename the directory if you wish.

  2. Open the project in CLion. Ignore any errors for now.

  3. We will modify the project to support both debug and release configurations. Most of the project configuration is done in the prj.conf file. Duplicate this file and rename the two files prj.ZDebug.conf and prj.ZRelease.conf.

  4. Open prj.ZDebug.conf and at the bottom add:

    # Use RTT instead of UART for debug output (optional)
     CONFIG_USE_SEGGER_RTT=y
     CONFIG_RTT_CONSOLE=y
     CONFIG_UART_CONSOLE=n
     # Optimize for debug
     CONFIG_DEBUG_OPTIMIZATIONS=y
  5. Open prj.ZRelease.conf and at the bottom add:

    # Use RTT instead of UART for debug output (optional)
     CONFIG_USE_SEGGER_RTT=y
     CONFIG_RTT_CONSOLE=y
     CONFIG_UART_CONSOLE=n
     # Optimize for speed. See https://docs.zephyrproject.org/latest/reference/kconfig/choice_471.html#choice-471 for other options
     CONFIG_SPEED_OPTIMIZATIONS=y
     # Disable assertions in the Zephyr Kernel. Improves execution speed and prevents a CMake configure warning. See https://docs.zephyrproject.org/latest/reference/kconfig/CONFIG_ASSERT.html
     CONFIG_ASSERT=n
  6. In CLion preferences, go to Build, Execution, Deployment > CMake. There should be an existing "Debug" profile. Change the "Build type" to "ZDebug".

    • The reason we use ZDebug instead of Debug is CMake has predefined configuration for the Debug and Release configurations – compile flags etc. Zephyr manages all configuration through KConfig, so we don't want the existing CMake configuration to interfere with the KConfig configuration. Because of this, if you use "Debug" or "Release" Zephyr will throw a warning about mismatched compile optimisation flags.
  7. Next we need to edit the environment variables for Zephyr.

    1. We need to set the environment variables in the CLion profile because this propagates them to processes launched by CMake, so targets that use west will work. If we set the environment variables in CMakeLists.txt, they would not propagate to launched processes.

    2. If you are using the toolchain manager, click the down arrow next to the NCS version installed and "Open Terminal" (macOS) or "Open Bash" (Windows). Then paste:

      echo "BOARD=nrf52dk_nrf52832;ZEPHYR_BASE=$(pwd);PATH=$PATH;GIT_EXEC_PATH=$GIT_EXEC_PATH;ZEPHYR_TOOLCHAIN_VARIANT=$ZEPHYR_TOOLCHAIN_VARIANT;GNUARMEMB_TOOLCHAIN_PATH=$GNUARMEMB_TOOLCHAIN_PATH"

      To copy the result directly to the clipboard, add | clip (Windows) or | pbcopy (macOS) and hit return. Paste the result into the "Environment" box in CLion.

    3. If you have installed manually, paste the following in the "Environment" box and modify.

      BOARD=nrf52dk_nrf52832;ZEPHYR_BASE=<ncsroot>;PATH=<ncsroot>/toolchain/bin:<existing path>;GIT_EXEC_PATH`=<ncsroot>/toolchain/Cellar/git/2.26.2/libexec/git-core;ZEPHYR_TOOLCHAIN_VARIANT=gnuarmemb;GNUARMEMB_TOOLCHAIN_PATH=<ncsroot>/toolchain
      • Modify ZEPHYR_BASE, GIT_EXEC_PATH and GNUARMEMB_TOOLCHAIN_PATH replacing <ncsroot>
      • The NCS toolchain must come before other paths in the PATH variable. CLion does not yet support variable expansion in environment variables so you need to enter the whole path, replacing <existing path>. To obtain the path to use, in a shell enter echo $PATH (macOS and linux) or in command prompt echo %PATH% (Windows).
    4. If you want to use a different board than the nRF52 DK, you will need to modify the BOARD environment variable to the board you want to use. The boards available are defined here in the "Build target" column. There is also a webinar and guide you can follow to create a custom board.

 
Configuring the ZDebug and ZRelease profiles in CLion

Configuring the ZDebug and ZRelease profiles in CLion

 
  1. Duplicate the "ZDebug" profile and modify the new profile's "Build type" to "ZRelease". Click OK.

  2. Open the CMakeLists.txt file. Before the find_package(Zephyr ...) line, insert:

    if (NOT CMAKE_BUILD_TYPE)
       set(CMAKE_BUILD_TYPE ZDebug)
     endif()
     # Point to the build type-specific config file
     set(CONF_FILE "prj.${CMAKE_BUILD_TYPE}.conf")
  3. Click Tools > CMake > Reset Cache and Reload Project.

  4. You can now use the zephyr_final target to build <project dir>/cmake-build-<profile>/zephyr.hex, and the flash target to build and flash to the board.

  5. You can get RTT output by following the steps in Nordic's "Testing with a sample application" guide. Essentially, after installing the JLink software and documentation pack, run:

    • Windows: JLinkRTTViewer.exe
    • macOS: open /usr/local/bin/JLinkRTTViewer.app
    • Linux: JLinkRTTViewerExe
  6. Next we will set up debugging. On the top right of the CLion window, click the configuration drop down and “Edit Configurations”. Then add a new “Embedded GDB Server” configuration:

 
Adding an embedded GDB server configuration

Adding an embedded GDB server configuration


Configure as shown:

 
Creating the debug configuration

Creating the debug configuration

 
  • Set a name
  • Share through VCS to share this with other CLion users of your project
  • Select the flash target
  • Select the zephyr_final executable
  • Set Download executable to None
  • Set Target remote args to tcp:localhost:2331
  • Set GDB Server to /usr/local/bin/JLinkGDBServer
  • Set GDB Server args to -device nrf52 -strict -timeout 0 -nogui -if swd -speed 4000 -endian little -s
  1. All done! Now you can build this target, which will build and flash to the softdevice, or you can debug. When debugging, if your breakpoint is not hit when the debugger starts, just press the reset button and continue:
 
Resetting the target

Resetting the target

 
  1. You can also view the state of peripherals on the device when debugging. When debugging click the "Peripherals" tab and click "Load .svd file":
 
peripherals.png
 
  1. Browse to <ncsroot>/modules/hal/nordic/nrfx/mdk and select the .svd file for your hardware (for nRF52832 use nrf52.svd), then select the peripherals you want to monitor. When the debugger is paused you will then be able to inspect the values of peripheral registers:
 
Viewing the peripheral registers

Viewing the peripheral registers

 
  1. In addition to using CLion for debugging, it's sometimes useful to use Segger Embedded Studio (SES). This is Nordic's officially supported IDE so is good to test with if you are having issues. In addition, when debugging you can see RTT output directly in the IDE with no configuration. You can open your project just like any sample project by following the instructions in the guide.
Nick
Using Android dependencies locally

Sometimes during development when your App depends on open source projects you might find a bug in them, want to use unreleased fixes available in the repository, or want to contribute a new feature. A good way to do this for more substantial changes is to clone the project locally, make the changes, and then you are immediately able to use the code in your App.

However, we needed to do this recently and couldn’t find any good examples of how to do it. It turns out to be quite easy. For this example we will use the RxAndroidBle project.

In your app's build.gradle you would already have something like this:

dependencies {
    ...
    api 'com.polidea.rxandroidble2:rxandroidble:1.11.1'
    api 'com.polidea.rxandroidble2:mockclient:1.11.1'
}

To switch out this remote dependency to a local dependency, first add the project as a submodule to your git repo by running:

git submodule add git@github.com:Polidea/RxAndroidBle.git

Then, in your settings.gradle at the root of the project, add:

// tag::composite_substitution[]
includeBuild('RxAndroidBle') {
    dependencySubstitution {
        substitute module('com.polidea.rxandroidble2:rxandroidble') with project(':rxandroidble')
        substitute module('com.polidea.rxandroidble2:mockclient') with project(':mockrxandroidble')
    }
}
// end::composite_substitution[]

This will replace any dependencies on com.polidea.rxandroidble2:rxandroidble and com.polidea.rxandroidble2:mockclient on their local directories inside the RxAndroidBle directory. Re-sync gradle and you're done!

Note: at the time of writing, there are issues using RxAndroidBle like this in Android Studio 4. I've submitted a pull request to fix this.


Nick
UK Government announces u-turn on contact tracing App

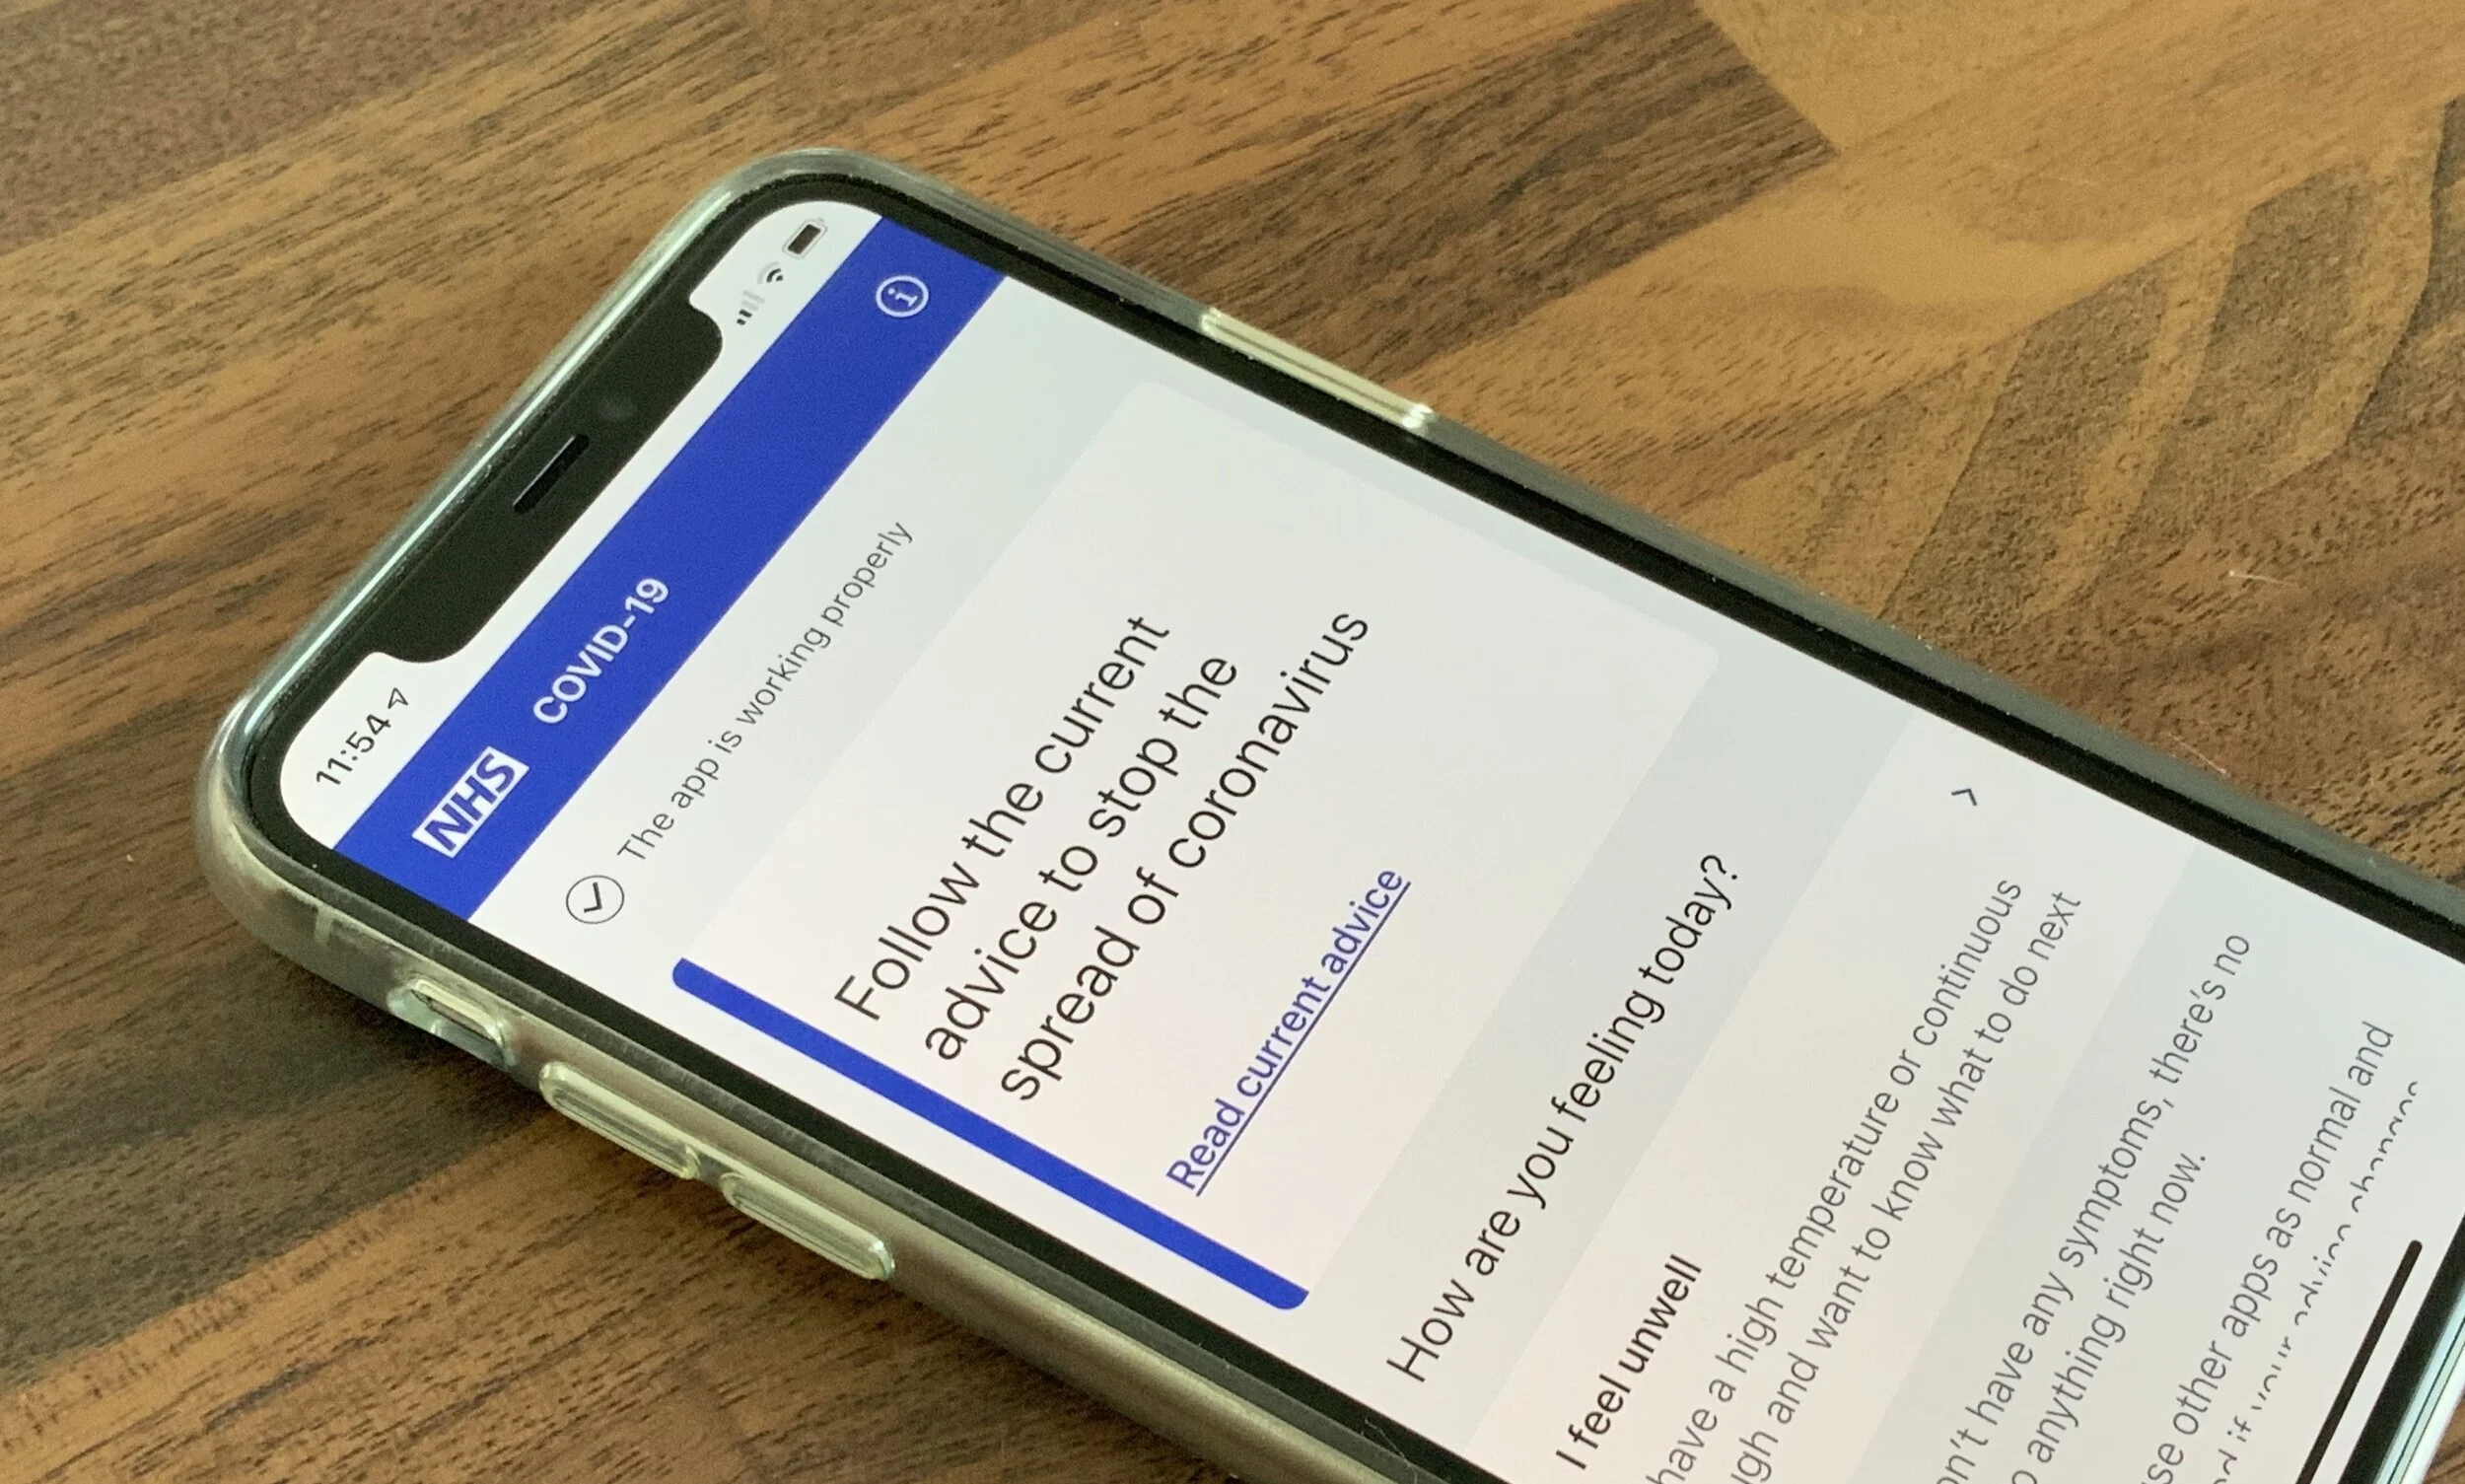
The UK government today announced a u-turn on its COVID-19 contact tracing App, shifting from a proprietary centralised system to a decentralised system built around Apple+Google’s Exposure Notification system.

The centralised version trialled on the Isle of Wight worked well at assessing the distance between two users, but was poor at recognising Apple's iPhones.

Specifically, the software registered about 75% of nearby Android handsets but only 4% of iPhones.

By contrast, the Apple-Google model logged 99% of both Android mobiles and iPhones.

The technical limitations of the App were investigated by NRB Tech in early May, concluding:

While it seems like the App will work most of the time, as identified here there are edge cases where it won’t. That’s a risk weighed up against the benefit of gaining more data by using a centralised system. However, the UK is an outlier here. It seems that most countries will use Apple and Google’s approach when it becomes available. Building a bespoke system which doesn’t work in some edge cases seems like a big risk, and one that the NHS may now be reconsidering.

It appears that the trial on the Isle of Wight confirmed these issues. While precious time has been lost pursuing the centralised system, lets hope now that an effective solution can be developed using the now-released Apple-Google solution.

Nick
Understanding the NHS contact tracing App

The NHS COVID-19 contact tracing App uses Bluetooth communication to determine which other phones you have been close to, and if you are later tested positive for the virus the system can then notify those other users that they may have contracted the virus. However, the way this is achieved is restricted, particularly on iOS, where Apple are very cautious about Apps consuming too much battery life.

Apple and Google saw this problem coming, and teamed up to develop a joint solution for countries to use. However, the NHS has decided against using this framework, because it would not provide them with the data they felt was sufficient to tackle the transmission of the virus. This means that they had to build their own solution, and attempt to work around the limitations imposed on them by the platforms, particularly iOS.

A technical deep-dive

So, how does the NHS App work, and what are the restrictions? The App works by advertising a Bluetooth service, scanning for the same service on other devices, connecting to another device when it discovers one, and exchanging an identifier. We’ll not focus on the security and privacy aspects here, which are discussed widely elsewhere, but instead on the technical limitations of the App.

The main limitation imposed on the App is when it operates in the background. The App asks the OS to scan for and advertise its service, which can continue even if the App’s process is not running. If another device is discovered or connects, the process is re-started in the background to handle the event. Apple’s documentation states that this should be short lived, and the App should only handle the specific event that occurred before becoming inactive again:

Apps should be session based and provide an interface that allows the user to decide when to start and stop the delivery of Bluetooth-related events.

Upon being woken up, an app has around 10 seconds to complete a task. Ideally, it should complete the task as fast as possible and allow itself to be suspended again. Apps that spend too much time executing in the background can be throttled back by the system or killed.

Apps should not use being woken up as an opportunity to perform extraneous tasks that are unrelated to why the app was woken up by the system.

However, the NHS App does not do that, so it may fall foul of Apple’s App Store review in the future. When the App connects to another device it sends “keep alive” data every 8s (“comfortably under” the 10s limit imposed by Apple) in order to keep the connection and the process alive. This works, at least for a while. Eventually iOS may kill the process anyway, or the device will go out of range.

When the App goes into the background iOS will continue advertising for around 4-7000 seconds (1-2h), and it will scan for the service on other devices. If it connects to another device this timeout might be reset, further research is required here. It seems based on reports that hopes are being pinned on Android devices “waking” the iOS process, so perhaps it does reset this timeout.

When iOS puts the App into the background the service is not advertised directly, instead it is placed into an “overflow area”. This is a proprietary iOS mechanism, but as Bluetooth is standardised we can attempt to determine how it works. Essentially a flag is set in the advertisement’s manufacturer data which corresponds to the UUID of the service. Android scans for this flag and so can discover iOS devices advertising in the background (although there is a bug which means it will currently not discover all iOS devices).

Failure cases

So when will the App not work? It ultimately fails when the user turns Bluetooth off, quits the App manually from the app switcher, or when the adverisements are stopped due to the timeout.

The first of those cases is worked around by sending the user a notification to turn Bluetooth back on. The second case is also user controlled, and while there is a notification to reopen the App it might not always work. The third case is not user controlled, and in our testing the timeout will occur even if iOS devices with the App are left in range of each other for period of time (but it might not occur if either of those devices are woken up during that period).

However, this is just the theory with a small number of devices. In practice, large numbers of devices may struggle to communicate consistently, and battery life may be impacted heavily. Testing this system is difficult and needs further research, but it’s not too early to draw some conclusions.

This App won’t work all the time

While it seems like the App will work most of the time, as identified here there are edge cases where it won’t. That’s a risk weighed up against the benefit of gaining more data by using a centralised system. However, the UK is an outlier here. It seems that most countries will use Apple and Google’s approach when it becomes available. Building a bespoke system which doesn’t work in some edge cases seems like a big risk, and one that the NHS may now be reconsidering.

Nick
Using CLion for Nordic nRF52 projects

Previously we have used nRF5-cmake-scripts to create a CMake project for Nordic nRF52. CLion is a great IDE for developing C and C++ CMake projects, and can also be used to debug the firmware.

First, follow the steps to create a nRF5-cmake-scripts project. When the project is opened in CLion, there is very little left to do.

We need to add a toolchain to use the ARM debugger client. In CLion preferences > Build, Execution, Deployment, create a new toolchain named arm-none-eabi and set the Debugger to “arm-none-eabi-gdb”:

 
Screenshot 2020-01-04 at 22.39.30.png
 

Then we need to use that toolchain for our CMake profile, in CLion preferences > Build, Execution, Deployment > CMake set the Toolchain to “arm-none-eabi”:

 
Screenshot 2020-01-04 at 22.39.40.png
 

Then we just need to create a build configuration. On the top right of the CLion window, click the configuration drop down and “Edit Configurations”. Then Add a new “Embedded GDB Server” configuration:

 
Screenshot 2020-01-04 at 22.40.03.png
 

Configure as shown:

 
Screenshot 2020-01-05 at 11.12.18.png
 
  1. Set a name

  2. Share through VCS to share this with other CLion users of your project

  3. Select the flash_bl_merge_<target> target

  4. Select your executable

  5. Set Download executable to None

  6. Set ‘target remote’ args to “tcp:localhost:2331”

  7. Set GDB Server to “/usr/local/bin/JLinkGDBServer”

  8. Set GDB Server args to “-device nrf52 -strict -timeout 0 -nogui -if swd -speed 1000 -endian little -s“

All done! Now you can build this target, which will build the firmware, bootloader, flash to the softdevice, or you can debug. When debugging, if your breakpoint is not hit when the debugger starts, just press the reset button and continue:

 
Screenshot 2020-01-05 at 11.20.07.png
 

You can also view the state of peripherals on the device when debugging. When debugging click the "Peripherals" tab and click "Load .svd file":

 
6.loadsvd.png
 

Browse to toolchains/nRF5/nRF5_SDK_16.0.0_98a08e2/modules/nrfx/mdk and select the .svd file for your hardware (for nRF52832 use nrf52.svd), then select the peripherals you want to monitor. When the debugger is paused you will then be able to inspect the values of peripheral registers:

 
7.peripherals.png
 
NickComment
Using CMake for Nordic nRF52 projects

CMake is a popular C/C++ build system (or an “open-source, cross-platform family of tools designed to build, test and package software” according to the website) that we use at NRB Tech with firmware projects and cross-platform libraries. CMake can also be used with CLion, an excellent C/C++ IDE. Nordic officially recommends and supports Segger Embedded Studio as its IDE of choice, however CMake makes managing dependencies and unit testing much easier.

For example, a common development architecture we use at NRB Tech is to share a C library or libraries between firmware, utilities, and Apps, to reduce code duplication and bugs and ensure mission-critical code is well unit tested. With CMake it is trivial to manage this library, generating Makefiles or Xcode projects as required and integrating as a dependency into other CMake projects.

Nordic do not directly provide support for CMake in their SDK, but their mesh SDK does use CMake, and this can be adapted to use CMake for the Nordic SDK in non-mesh projects.

nRF5-cmake-scripts

Nordic’s mesh SDK was not designed for building external, custom, non-mesh projects, but with a little external support it can be used for this purpose, which is what our nRF5-cmake-scripts project does – it uses the mesh SDK scripts where possible, and defines its own functions for everything else – including adding features that Nordic’s mesh SDK doesn’t have, such as adding bootloader targets and creating DFU packages. It also defines functions for easily including many of the libraries in the Nordic SDK. Let’s have a go at creating a new project from scratch.

Installing the dependencies

  • Download and install JLink

  • Download and install Nordic command line tools

  • Download and install ARM GNU Toolchain

    • On Mac, this can be installed via homebrew:

      brew tap ArmMbed/homebrew-formulae
      brew install arm-none-eabi-gcc
  • Install nrfutil via pip (Python package manager):

    pip install nrfutil
  • Install CMake and Git

Creating a CMake based Nordic firmware project

The finished project can be found here.

First, in a terminal/command window clone the base project to set up the project structure:

git clone --recurse-submodules https://github.com/NRB-Tech/nRF5-cmake-scripts-example-base.git .

Run a script to clean up the project ready for your own use (on Windows, run in git bash by right clicking in directory > "Git Bash here"):

./cleanup.sh

Copy the example CMakeLists.txt as recommended in the nRF5-cmake-scripts readme:

cmake -E copy nRF5-cmake-scripts/example/CMakeLists.txt .

_Note: You may also need to edit some of the variables in this file for your platform, such as setting NRFJPROG, MERGEHEX, NRFUTIL and PATCH_EXECUTABLE manually if they are not in your PATH._

Then we can use the script to download the dependencies:

cmake -Bcmake-build-download -G "Unix Makefiles" .
# on Windows, run `cmake -Bcmake-build-download -G "MinGW Makefiles" .`
cmake --build cmake-build-download/ --target download

Copy across some files from an SDK example project (for the nRF52840 DK, replace pca10040/s132 with pca10056/s140):

cmake -E copy toolchains/nRF5/nRF5_SDK_16.0.0_98a08e2/examples/ble_peripheral/ble_app_template/pca10040/s132/armgcc/ble_app_template_gcc_nrf52.ld src/gcc_nrf52.ld
cmake -E copy toolchains/nRF5/nRF5_SDK_16.0.0_98a08e2/examples/ble_peripheral/ble_app_template/pca10040/s132/config/sdk_config.h src/

At this point, you can open the project in CLion or your editor of choice to edit the files.

Add a file src/main.c and add some source code. Here we add some simple code to log a message.

#include "nrf_log_default_backends.h"
#include "nrf_log.h"
#include "nrf_log_ctrl.h"

int main(void) {
    ret_code_t err_code = NRF_LOG_INIT(NULL);
    APP_ERROR_CHECK(err_code);

    NRF_LOG_DEFAULT_BACKENDS_INIT();

    NRF_LOG_INFO("Hello world");
    while(true) {
        // do nothing
    }
}

Create an src/app_config.h file to override some of the default configuration in sdk_config.h:

#define NRF_LOG_BACKEND_RTT_ENABLED 1 // enable rtt
#define NRF_LOG_BACKEND_UART_ENABLED 0 // disable uart
#define NRF_LOG_DEFERRED 0 // flush logs immediately
#define NRF_LOG_ALLOW_OVERFLOW 0 // no overflow
#define SEGGER_RTT_CONFIG_DEFAULT_MODE 2 // block until processed

We are going to include the DFU bootloader too, so we need to generate keys. In terminal/command prompt:

nrfutil keys generate keys/dfu_private.key
nrfutil keys display --key pk --format code keys/dfu_private.key --out_file keys/dfu_public_key.c

Now we need to create a file src/CMakeLists.txt to build our targets:

set(NRF5_LINKER_SCRIPT ${CMAKE_CURRENT_SOURCE_DIR}/gcc_${NRF_FAMILY})

# DFU requirements
# List the softdevice versions previously used, or use FALSE if no previous softdevices
set(PREVIOUS_SOFTDEVICES FALSE)
# Set the location to the DFU private key
set(PRIVATE_KEY ${CMAKE_CURRENT_SOURCE_DIR}/../keys/dfu_private.key)
set(PUBLIC_KEY ${CMAKE_CURRENT_SOURCE_DIR}/../keys/dfu_public_key.c)
# Set the App validation type. [NO_VALIDATION|VALIDATE_GENERATED_CRC|VALIDATE_GENERATED_SHA256|VALIDATE_ECDSA_P256_SHA256]
set(APP_VALIDATION_TYPE NO_VALIDATION)
# Set the Soft Device validation type. [NO_VALIDATION|VALIDATE_GENERATED_CRC|VALIDATE_GENERATED_SHA256|VALIDATE_ECDSA_P256_SHA256]
set(SD_VALIDATION_TYPE NO_VALIDATION)
# The bootloader version (user defined)
set(BOOTLOADER_VERSION 1)
# The DFU version string (firmware version string)
set(DFU_VERSION_STRING "${VERSION_STRING}")

# Set the target name
set(target example)

# add the required libraries for this example
nRF5_addLog()
nRF5_addSeggerRTT()
nRF5_addAppError()

# include files
list(APPEND SOURCE_FILES
        main.c
        )
list(APPEND INCLUDE_DIRS
        "${CMAKE_CURRENT_SOURCE_DIR}"
        )

nRF5_addExecutable(${target} "${SOURCE_FILES}" "${INCLUDE_DIRS}" "${NRF5_LINKER_SCRIPT}")

# make sdk_config.h import app_config.h
target_compile_definitions(${target} PRIVATE USE_APP_CONFIG)

# Here you can set a list of user variables to be defined in the bootloader makefile (which you have modified yourself)
set(bootloader_vars "")

# add the secure bootloader build target
nRF5_addSecureBootloader(${target} "${PUBLIC_KEY}" "${bootloader_vars}")
# add the bootloader merge target
nRF5_addBootloaderMergeTarget(${target} ${DFU_VERSION_STRING} ${PRIVATE_KEY} ${PREVIOUS_SOFTDEVICES} ${APP_VALIDATION_TYPE} ${SD_VALIDATION_TYPE} ${BOOTLOADER_VERSION})
# add the bootloader merged flash target
nRF5_addFlashTarget(bl_merge_${target} "${CMAKE_CURRENT_BINARY_DIR}/${target}_bl_merged.hex")
# Add the Bootloader + SoftDevice + App package target
nRF5_addDFU_BL_SD_APP_PkgTarget(${target} ${DFU_VERSION_STRING} ${PRIVATE_KEY} ${PREVIOUS_SOFTDEVICES} ${APP_VALIDATION_TYPE} ${SD_VALIDATION_TYPE} ${BOOTLOADER_VERSION})
# Add the App package target
nRF5_addDFU_APP_PkgTarget(${target} ${DFU_VERSION_STRING} ${PRIVATE_KEY} ${PREVIOUS_SOFTDEVICES} ${APP_VALIDATION_TYPE})

# print the size of consumed RAM and flash - does not yet work on Windows
if(NOT ${CMAKE_HOST_SYSTEM_NAME} STREQUAL "Windows")
    nRF5_print_size(${target} ${NRF5_LINKER_SCRIPT} TRUE)
endif()

Then we are ready to build and run our example. First, run JLink tools to get the RTT output:

cmake -Bcmake-build-debug -G "Unix Makefiles" -DCMAKE_BUILD_TYPE=Debug .
# On Windows, run `cmake -Bcmake-build-debug -G "MinGW Makefiles" -DCMAKE_BUILD_TYPE=Debug .` 
# If you get an error that the compiler cannot be found, ensure it is present in your PATH (try running `arm-none-eabi-gcc`). Windows users, see the dependencies section.
cmake --build cmake-build-debug/ --target START_JLINK_RTT

Then, build the merge and flash target:

cmake --build cmake-build-debug/ --target flash_bl_merge_example

You should see the "Hello world" log output in the RTT console! From here you can add source code and include SDK libraries with the macros provided in nRF5-cmake-scripts/includes/libraries.cmake.

NRB Tech uses CMake to create well tested products utilising cross-platform code. If you are looking at creating a new product, or want to work on a diverse range of cross platform product development, get in touch.

Medical technologies in the Leeds City Region

On Monday 22nd May Translate MedTech launched a “call for project definitions” in support of the Leeds City Region’s bid for the UK Strength in Places fund, and NRB Tech attended the launch event. The event was very productive and well attended, bringing together industry, academia and healthcare and demonstrating the wealth of expertise in medical technology in the region.

The Strength in Places Fund (SIPF) is led by UK Research and Innovation (UKRI) and is a fund aimed at generating economic development in the regions of the UK. Regions can bid for funding of between £10-50m for a number of projects to be conducted entirely within the region. Bids are not limited to medical technologies, but any sector that has the potential to generate economic growth. Leeds City Region was successful in it’s stage 1 expression of interest, and along with 2 other bids from the Yorkshire and Humber region will proceed to stage 2, submitting full grant proposals.

 
The global medical technology market is growing at 5.6% a year, expected to reach $595bn by 2024 (Evaluate MedTech)

The global medical technology market is growing at 5.6% a year, expected to reach $595bn by 2024 (Evaluate MedTech)


The call for medical technology project definitions in the Leeds City Region closes on the 21st June, but following that if the bid is successful other projects may be included in the grant in the future. The projects must be industry matched, with small companies providing 30% contribution in kind or direct cash and large companies providing 50%. This represents a significant opportunity to further develop medical technology in the Leeds City Region, which already has a strong medical technology sector with good networks between industry, academia and healthcare. To apply or for more details, visit the Grow MedTech website.

If you are interested in building a medical technology device but are in need of an industry partner for building the device or Apps, please get in touch!

Introducing NRB Tech...

Increasingly many products are becoming ‘smart’ – from the questionably useful smart egg tray, salt dispenser and toaster to the popular Nest thermostat, Hue lightbulbs and Ring doorbell – it seems like everything is now internet connected. Many of these Internet of Things (IoT) products are taking industries by surprise – who could have predicted consumers would be getting excited about a $300 thermostat before Nest arrived?

 
The Nest thermostat

The Nest thermostat


IoT or smart devices are usually connected to a smart phone App via Bluetooth Low Energy (BLE) or via WiFi to the cloud. This connection to a smart phone with significant processing power and a large touch screen display that is always on the user and connected to the internet opens up many possibilities to transform a device’s capabilities. For example, a conventional lock requires a physical key (which requires its own security) and the user to manually open it when they need access. A smart lock can be opened by multiple people who have permission, can be locked or unlocked remotely, can lock or unlock on a schedule, or even lock when a user walks out of range.

For companies familiar with building either hardware or software, IoT can be a daunting prospect. These disciplines have been largely separate for many years, each developing their own methodologies and management practices. IoT brings them together, introducing new challenges: to create a successful IoT product you must simultaneously deliver hardware, with high capital investment and a long waterfall development cycle, and accompanying software, the development of which typically moves in much faster cycles (agile development) and is always being updated.

Balancing the needs of software and hardware development can be a real challenge, and if your company only has experience in one discipline it can be faster and more cost effective to look for external assistance. NRB Tech can help bridge the gap between hardware and software, providing the services and knowledge you need to make your product smart, develop a hardware device for your software, or build something completely new.

Our development process

IoT products often create or disrupt product categories, and are inherently unproven, so when developing IoT products we tackle the big challenges first – whether hardware, software, or the market itself – creating a simple functional prototype to prove and test the concept. Once we know the idea works and have developed a product specification, we focus on the core features initially and develop the product in short sprints, getting feedback from the client with hands on prototypes as frequently as possible. This allows clients to change their mind about the features of the product and the way it will work as it is realised. This approach also reduces risk and gives clients the confidence that a product will be viable.

 
NRB Tech has been working with AirTurn to build their new range of foot pedals, all of which are software-updateable, in addition to a suite of Apps and third party SDK. airturn.com

NRB Tech has been working with AirTurn to build their new range of foot pedals, all of which are software-updateable, in addition to a suite of Apps and third party SDK. airturn.com


Our ethos

Not all products need to be smart – we live on a planet with finite resources, and gimmicky products with a short lifespan are not sustainable. NRB Tech takes its commitment to being a responsible business seriously, so we will only work on projects that have clear value to consumers, businesses, or the environment.

As part of our commitment to creating sustainable products with a long life all products we create can be updated in the field, reducing the risk at first release, ensuring Apps and devices continue to work as the hardware and software platforms are developed, and delighting customers by gradually enhancing the product over time with feature development.

We nurture long term business relationships by ensuring clients are satisfied and their customers are happy. But we understand that businesses and situations can change, so we make no attempt to tie clients into working with us indefinitely – thorough technical documentation is provided, we use industry standards whenever possible, and we always avoid lock-in with other vendors in developing the product.

Security

As IoT devices are connected, security is paramount. Many IoT products have been found to have severe vulnerabilities which can ruin a product in its early stages. We use strong encryption and appropriate authentication mechanisms whenever necessary, but importantly we also seek external validation through penetration testing when a product demands it, as nobody has a monopoly on security.

If you have an idea for a product which you’ve been wanting to build or are looking to expand your product portfolio please get in touch.

About NRB Tech

Nick Brook started creating IoT devices and Apps commercially in 2012, and in September 2018 founded NRB Tech to expand the business to a wider audience and grow its capacity to deliver more high quality IoT projects.

Engineering and software development has long been a passion of Nick’s, and IoT is at the intersection of these two worlds, combining software running on high and low power systems with a physical product that can sense and manipulate the real world.

After graduating in Electronic Engineering from Durham university in 2011, Nick took a job at RMP Enterprise, who wanted to create a new mobile survey application as a service for clients to use at events and conferences. Nick built a team of 2 other developers and created Akkroo. Akkroo grew quickly and became used by large clients such as IBM, PayPal, HSBC and many more. Nick left Akkroo in 2012, but in 2019 Akkroo sold for $34m.

Nick wanted to get back to creating high quality physical products that combined software and hardware into something that people find useful. Nick has worked on many projects over the years, including the AirTurn foot pedals, Craftsman Smart Toolbox, ProGlove barcode scanner, sensors, medical technology devices, beacons and more.

In 2018, Nick started NRB Tech to help cater to a wider audience and grow the capacity of the business. NRB Tech is ideally placed to help companies deliver products in this new market, combining skills and expertise developed across several years and many projects to deliver high quality IoT products on time and on budget.

 
Nick in Bergen, Norway, 2019

Nick in Bergen, Norway, 2019